
This isn’t going to be a tutorial so much as some thoughts I’m jotting down a couple of days after completing my first large terrain project using my Aufero Laser 2 laser engraver. I hope that it will be helpful for those of you thinking about getting your own laser engraver for hobby projects. I am thinking about putting together a more comprehensive tutorial in the future.

My design work was done in LightBurn. Lightburn is one of the two most commonly used pieces of software offered for people with diode lasers (specifically those with GRBL-based controllers (not all do). Of the two, this one is the one that isn’t free. It’s also the one that is the easiest to use and comes with a complete set of design tools on top of just being able to control the laser. It’s well worth the $60 price tag.

I should probably mention that I didn’t design the building out of whole cloth. The building is based on an existing structure that is in Wyoming that was built in 1898. It’s a pretty standard design of what is essentially a box in back and facade up front. I picked this design specifically because I found a set of elevations for it on a model railroad site. This meant that I didn’t need to guess about scale and placement of various elements of the design. That’s actually something that frequently keeps me from even starting projects let alone finishing them. With the plans in hand I could just move forward and modify things in order to make it work better for this specific project.
What got modified? Well, that inset doorway looked like a pain in the ass to try to get right so I just made it flat across the front instead. That inset doorway seems much fancier than I’m used to seeing in photos of the period. I actually wonder if it isn’t a later addition. In any case, that went. I didn’t add in any of the interior walls. There were a few for storage in back. I figured if I decided I needed them it could be added later. One of those back rooms also had an exterior door. That became a window. I also decided not to include stairs from the porch as that would entail building terrain into the building itself and that was a whole thing I didn’t want to worry about.
I’m sort of getting ahead of myself though. Before I made any of these decisions I had to get the plans into the program and determine the size they needed to be. Importing the images was easy enough but even though I had the scale of the drawings determining what size I needed them to be was something else. I initially decided to scale them to be as close to 1/56 scale as I could get them in the program (1/56 scale being a scale that is largely used a the actual scale of 28mm minis) but then I printed out the drawing for the front of the building and put some minis that I would be using next to it to see how it looked. A bit small as it turns out. Not that small. It probably would have worked but I bumped up the size a fair amount anyway so that the minis would be able to pass through the doorway unhindered (base and all). With that decided I could move forward with the design.
With that done the next step is essentially just tracing. I used the tools within LightBurn to trace out the drawings - at least those portions I was planning to use. One thing I thought would be important to making the building look good would be the details on the facade. I didn’t want to just etch those details on to the surface of a single piece of wood. I decided that there would be a number of raised details that I would need to call out and cut in thinner stock than the walls. When you look at the final picture I think you can see that this really worked out well. There are two pieces in particular that are just small vertical pieces next to the door that have a little bit of their own etched detail that really sell the reality of the building in my mind. I did actually etch all of this detail into the walls though. It was really helpful when it came time to place and glue all of those details later.
One thing I don’t think I gave enough thought at this point was the roof. I had a vague idea about how I wanted to do it and created some triangular supports for it but I didn’t really think about it anymore until after I had cut the rest of the building. I think it’s for this reason that the roof is my least-favorite part of the construction. It works and it looks fine but I wanted a removable roof if I wanted to move minis around inside of it and the whole thing doesn’t feel as rugged as I’d like for something I’m planning to remove and replace. My next building will probably be better in this regard.
Another element that was important to consider at this point was the thickness of the material I’d be making this building out of. Although a lot of people like to use MDF for buildings, I’m becoming more fond of birch plywood. I had a few thicknesses to choose from so I decided that the walls would be 1/8” and the surface details would be 1/16”, the shingles on the roof ended up being a birch veneer held together on a sheet of cardstock. Like most of the laser cut buildings you’ve probably seen I was planning to hold things together using a tab and slot style construction - though I wanted to keep the tabs to a minimum.

With the design work done the next step was to cut out the walls. I really love working with the laser. I have a couple of 3D printers and I like working with them as well but when your 3D print comes out badly it can be super depressing know that you now have to go through the process of figuring out why the thing failed. With the laser things can certainly go wrong but the list of failure points is really small and generally pretty obvious. On this project I had one failure because my first piece of wood was more warped than I thought and the laser head touched the material just enough to shift it slightly. That’s a user error and I wouldn’t repeat it. As you can see from the photos that the final cut results were super clean.

With the walls done I went ahead and did the surface details. No problems there. Once I started putting things together I realized that I had a few pieces that were probably superfluous and didn’t end up using them (primarily on the side windows IIRC). Having etched all of the detail into the walls was super helpful at this stage.
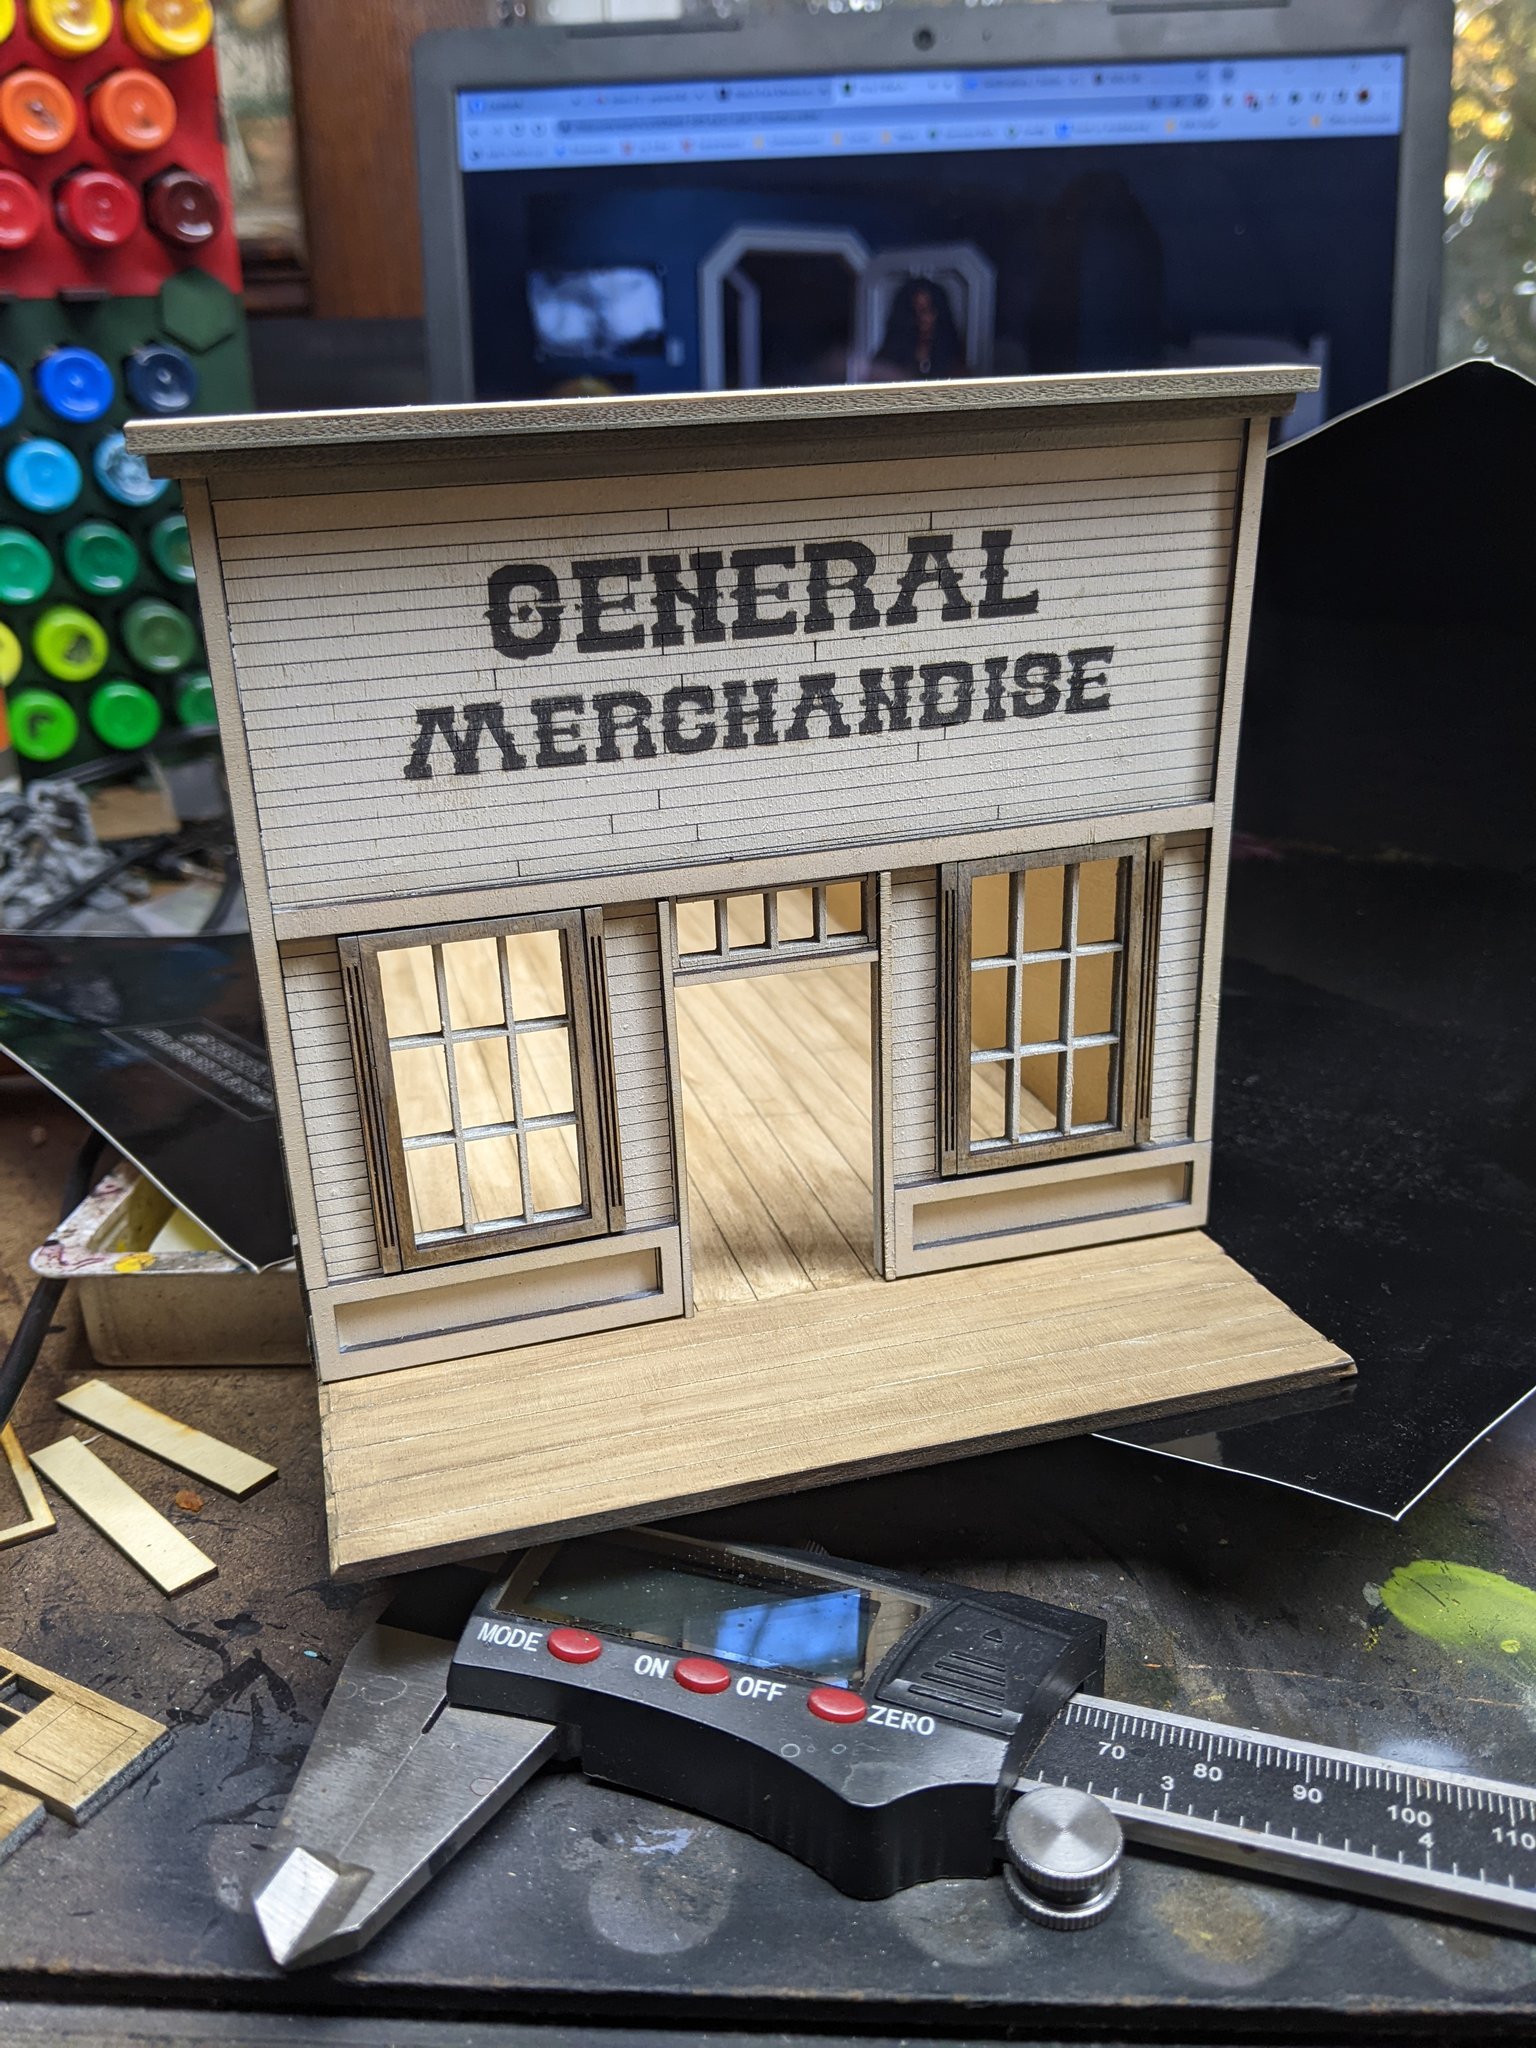
I’m not going to talk much about paint here. I did use the regular paints I generally use for minis. It was at this point I decided that I would paint the sign directly to the wall as opposed to adding a sign. I cut a stencil using laser-safe vinyl. Regular vinyl is really bad for cutting as it will release extremely toxic fumes that can hurt your lungs (and potentially kill you in large enough doses) as well as damage your laser. I could have also cut it out of masking tape if I didn’t have anything else. Just as an aside - it was the idea of stencil cutting that got me interested in getting a laser cutter in the first place.

At this point I had to figure out the roof which I really should have given more thought to. I’m not going to go into it as I’m not that happy with it but it looks fine. The veneer I used for the shingles are too thin but I’m probably the only person would would notice without me mentioning it. And, like I mentioned earlier, it’s not as sturdy as I’d like - but again that’s just me.
I’m really happy with the final look. This is also a really good jumping off point for more buildings. Future buildings will probably not be quite as long as this one (it feels like it’s going to take up a lot of table space). The basic design is really sound. I could easily repeat this with some minor changes and nobody would know it was essentially the same building. Just adding an awning would do that. I also look forward to trying to do multi-story buildings.